ladies at autoexpo

CHECK ALL THE BEAUTIES AT AUTO EXPO WITH THEIR CARS AND CHECK ALL ENTERTAINMENT NEWS .

FACEBOOK TRICK UPSIDE DOWN

ENJOY FACEBOOK TRICKS AND TIPS AND UPDATES PROVIDED AND ALMOST EVERY TRICKS AND TIPS UPDATING DAILY .

OLD AND NEW SONGS DOWNLOADS

DOWNLOAD ALL TELUGU SONGS NEW SONGS AND OLD SONGS ,ALL UPDATED ,ARRANGED IN SYMBOL-WISE SEARCH .

DOWNLOAD BEAUTIFUL WALLPAPERS

DOWNLOAD ALL KINDS OF WALLPAPERS LIKE CARS , ACTRESS , ABSTRACT , AND ALMOST ALL KINDS ... .

celebrities caught

ENJOY THE CONTENT PROVIDED FOR REGULAR VIEWERS FOR MY WEBSITE , DAILY REFRESHED CONTENT .

Showing posts with label Photoshop Text Effects Tutorials. Show all posts

Monday, 28 February 2011

cut effect


In this Photoshop text effects tutorial, we're going to create some knock out text. By that, I mean we're going to look at how to use one of Photoshop's more interesting shape options to knock out sections of letters that overlap each other! Of course, you can't use shape options unless you're working with shapes, so along the way, we'll see how to convert text to a shape, which opens up a lot more possibilities for us when it comes to creating cool text effects. Here's an example of the result we're going for:
The final knock out text effect in Photoshop. Image © 2009 Photoshop Essentials.com.
Photoshop Text Effects: The final "knock out" text effect.
Let's get started!
Want an easier way to follow along with our tutorials? Download them as printable PDFs!

Step 1: Create A New Blank Document

First, create a new Photoshop document, either by going up to the File menu at the top of the screen and choosing New or by pressing the keyboard shortcut Ctrl+N (Win) / Command+N (Mac). Either way brings up Photoshop's New Document dialog box. Enter the dimensions you need for your document. For this tutorial, if you want to follow along, I'll enter 4 inches for my Width2 inches for my Height, and a Resolution value of 300 pixels/inch. I'll also set my Background Contents to White which will fill the background of my new document with white. When you're done, click OK in the top right corner of the dialog box to exit out of it. Your new document will appear on your screen:
The New Document dialog box in Photoshop. Image © 2009 Photoshop Essentials.com.
Photoshop Text Effects: Create a new Photoshop document using the New Document dialog box.

Step 2: Select The Type Tool

With our new document created, we can begin working on our effect. Since this is a text effect, we'll need some text, and for that, we'll need Photoshop Type Tool. Grab it from the Tools palette, or simply press the letter T on your keyboard to select it with the shortcut:
The Type Tool in Photoshop. Image © 2009 Photoshop Essentials.com.
Photoshop Text Effects: Select the Type Tool.

Step 3: Select A Font

With the Type Tool selected, the Options Bar at the top of the screen changes to show options specifically for the Type Tool. Over on the left of the Options Bar is where we can choose a font. Select the font you want to use for your effect. Your choice of fonts will depend on which fonts you currently have installed on your computer. This effect works best with fonts that have big, thick letters, so I'm going to choose Cooper Std. Don't worry about the size of the font for now:
Selecting a font from the Options Bar in Photoshop. Image © 2009 Photoshop Essentials.com.
Photoshop Text Effects: Select a font from the Options Bar.

Step 4: Select A Color For The Text

Next, we need to select a color for our text. If you move further to the right in the Options Bar, you'll find a color swatch. This color swatch shows you the currently selected text color. To change the color of your text, simply click directly on the color swatch:
The color swatch showing the current text color in Photoshop. Image © 2009 Photoshop Essentials.com.
Photoshop Text Effects: The color swatch shows the current text color. Click on the color swatch to change the color.
This brings up Photoshop's Color Picker. Choose a color for your text. I'm going to choose a medium shade of blue. When you're done, click OK to exit out of the Color Picker, and you'll see that the color swatch in the Options Bar has changed the show the color you've chosen:
The Color Picker in Photoshop. Image © 2009 Photoshop Essentials.com.
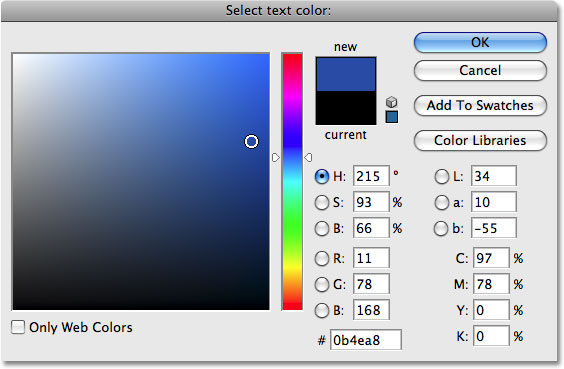
Photoshop Text Effects: Choose a color for your text from the Color Picker.

Step 5: Add Your Text

With the Type Tool, a font and a color for the text all selected, click inside your document and add your text. I'm going to type the word "PHOTOSHOP", all in capital letters:
The Color Picker in Photoshop. Image © 2009 Photoshop Essentials.com.
Photoshop Text Effects: Add your text to the document.
Once you've added your text, click on the checkmark in the Options Bar to accept it and exit out of text editing mode.
Clicking the checkmark to accept the text in Photoshop. Image © 2009 Photoshop Essentials.com.
Photoshop Text Effects: Click on the checkmark in the Options Bar to accept the text.

Step 6: Resize The Text If Needed With Free Transform

If you need to resize or move your text, or both, go up to the Edit menu at the top of the screen and choose Free Transform, or for a faster way to access the Free Transform command, press Ctrl+T (Win) / Command+T (Mac):
Selecting the Free Transform command in Photoshop. Image © 2009 Photoshop Essentials.com.
Photoshop Text Effects: Go to Edit > Free Transform.
You'll see the Free Transform box and handles appear around your text in the document. To resize the text, hold down your Shiftkey, which will constrain the aspect ratio of the text as you resize it, then click on any of the corner handles (the little squares) and drag the handle inward or outward depending on whether you need to make the text larger or smaller. To move the text, click anywhere inside the Free Transform box and drag the text to a new location. I'm going to make my text a little bigger by dragging the handle in the bottom right corner outward:
Resizing text with Free Transform in Photoshop. Image © 2009 Photoshop Essentials.com.
Photoshop Text Effects: Resize and move the text if needed with Free Transform.
Press Enter (Win) / Return (Mac) when you're done to accept the transformation and exit out of the Free Transform command.

Step 7: Convert The Text To A Shape

Make sure you have everything spelled correctly because at this point, we need to convert our text into a shape. Once it's converted to a shape, the text will no longer be editable, so double check to make sure you haven't made any mistakes. To convert the text to a shape, go up to the Layer menu at the top of the screen, choose Type, and then choose Convert to Shape:
Converting the text to a shape in Photoshop. Image © 2009 Photoshop Essentials.com.
Photoshop Text Effects: Go to Layer > Type > Convert to Shape.
If we look in the Layers palette now, we can see that our text layer has become a shape layer. Even though the text still looks like, well, text in the document, the letters are now individual shapes, which means we can now work with them the same way we could work with any other shape in Photoshop:
The Layers palette showing the new Shape layer. Image © 2009 Photoshop Essentials.com.
Photoshop Text Effects: The text now appears as a Shape layer in the Layers palette.

Step 8: Select The Path Selection Tool

We need to select all of our letters (shapes) at once. You may think we could use the Rectangular Marquee Tool, but since we're working with shapes, we'll actually need a different selection tool - the Path Selection Tool. Grab it from the Tools palette or press the letter A on your keyboard to select it with the shortcut:
The Path Selection Tool in Photoshop. Image © 2009 Photoshop Essentials.com.
Photoshop Text Effects: Select the Path Selection Tool.

Step 9: Drag A Selection Around The Entire Word

To select all the letters at once, simply click and drag out a selection box around the entire word, just like you would if you were using the Rectangular Marquee Tool. You'll see a thin dotted outline appearing as you drag:
Dragging a selection around the word with the Path Selection Tool. Image © 2009 Photoshop Essentials.com.
Photoshop Text Effects: Drag a selection around the entire word with the Path Selection Tool.
Once you have the entire word surrounded by the selection, release your mouse button. The rectangular selection outline will disappear, and you'll see that each individual letter now has an outline around it, with little squares (called anchor points) sitting at different spots around the letters:
The letter shapes are now selected. Image © 2009 Photoshop Essentials.com.
Photoshop Text Effects: All of the letters (shapes) are now selected.
If you want to learn more about working with paths and anchor points in Photoshop, I cover them in detail in our popular Making Selections With The Pen Tool tutorial which you'll find in the Photoshop Basics section of the website.

Step 10: Select The "Exclude Overlapping Shape Areas" Option

With all of our letter shapes now selected, go up to the Options Bar at the top of the screen. On the left, you'll see a series of four icons, each one showing a different combination of squares. These icons represent different options for how our shapes can interact with each other. The one we want for this effect is the one on the far right - the Exclude overlapping shape areas option. Click on the icon to select it. If you have Tool Tips enabled in Photoshop's Preferences, you'll see the name of the option appear when you hover over the icon:
Selecting the 'Exclude overlapping shape areas' option in Photoshop. Image © 2009 Photoshop Essentials.com.
Photoshop Text Effects: Select the "Exclude overlapping shape areas" option in the Options Bar.

Step 11: Deselect The Letters

In a moment, we're going to drag the individual letters over top of each other so that the shapes will overlap. The option we just selected in the Options Bar will cause the overlapping areas to disappear. Before we can do that though, we first need to deselect the letters, otherwise if we try to drag any one of them, we'll end up dragging all of them at the same time. To deselect the letters, simply click on any blank area in the document. You'll see all the anchor points disappear from around the letters, telling us that the shapes are no longer selected. You may still see an outline around the letters, but don't worry about it for now. We'll remove it when we're done:
The letter shapes are no longer selected. Image © 2009 Photoshop Essentials.com.
Photoshop Text Effects: Click on any blank area of the document to deselect the letter shapes.

Step 12: Drag The Letters Together So They're Overlapping

This is the fun part. With the Path Selection Tool still selected, click on the second letter in the word and drag it towards the left until part of the letter is overlapping the first letter in the word. Like magic, the area that overlaps disappears from view:
Overlapping the letter shapes. Image © 2009 Photoshop Essentials.com.
Photoshop Text Effects: The area that overlaps between the two letter shapes disappears.
Continue dragging each letter towards the left until part of it overlaps the previous letter. For added variety, try rotating some of the letters with the Free Transform command. Simply click on the letter with the Path Selection Tool to select, then press Ctrl+T (Win) / Command+T (Mac) to quickly bring up the Free Transform box and handles around the letter. Move your cursor anywhere outside of the Free Transform box, then click and drag to rotate the letter. Here, I'm rotating the letter T towards the left.
Overlapping the letter shapes. Image © 2009 Photoshop Essentials.com.
Photoshop Text Effects: The area that overlaps between the two letter shapes disappears.
When you're done rotating the letter, press Enter (Win) / Return (Mac) to accept the transformation. Continue overlapping each letter until you reach the end of the word. Your final result should look something like this:
All the letter shapes now overlap each other. Image © 2009 Photoshop Essentials.com.
Photoshop Text Effects: All of the letters in the word are now overlapping each other.

Step 13: Deselect The Vector Mask To Remove The Outline From Around The Text

The outline that's appearing around the text is making things look rather harsh, so let's get rid of it and clean things up. The reason the outline is visible is because we currently have the vector mask selected on the shape layer. If we look at the shape layer in the Layers palette, we can see that it contains a couple of thumbnails. The thumbnail on the right is the vector mask thumbnail, which, as you can see by looking at it, contains the shapes of our letters. If you look closely, you'll see a white highlight border around the thumbnail. This means that we currently have the vector mask selected. Click directly on the thumbnail to deselect it:
The vector mask thumbnail on the shape layer in Photoshop. Image © 2009 Photoshop Essentials.com.
Photoshop Text Effects: Click on the vector mask thumbnail to deselect the vector mask and remove the outline from around the text.
The highlight border will disappear from around the thumbnail in the Layers palette, and the outline will disappear from around our text, allowing us to see what our final effect really looks like:
The final knock out text effect in Photoshop. Image © 2009 Photoshop Essentials.com.
Photoshop Text Effects: The final "knock out" text effect.
To add even more interest to the effect, experiment with layer styles. For example, here's the result I came up with by applying the same layer styles that I used in the Fun, Easy Gel Text Effect tutorial, which you'll find listed with the rest of our Text Effectstutorials:
The final knock out text effect in Photoshop. Image © 2009 Photoshop Essentials.com.
Photoshop Text Effects: The same effect after experimenting with layer styles.
And there we have it!

text inside text


Step 1: Create A New Document

First, we need a document, so go up to the File menu at the top of the screen and choose New..., or use the keyboard shortcutCtrl+N (Win) / Command+N (Mac) to quickly bring up Photoshop's New Document dialog box. Choose the size you want for your document. I'll set mine to a 6 x 4 inch document, but you can use whichever size you need. Since I want this to look good when I print it, I'll set my Resolution to 300 pixels/inch. Make sure the Background Contents option is set to White, then click OK when you're done to create your new document:
The New Document dialog box in Photoshop. Image © 2008 Photoshop Essentials.com.
Photoshop Text Effects: Choose a size, resolution and background color for your new Photoshop document.

Step 2: Select The Type Tool

Next, in order to add our text, we need to Type Tool. Grab it from the Tools palette or press the letter T on your keyboard to select it with the shortcut:
The Type Tool in Photoshop. Image © 2008 Photoshop Essentials.com.
Photoshop Text Effects: Select Photoshop's Type Tool.

Step 3: Select Your Font From The Options Bar

With the Type Tool selected, go up to the Options Bar at the top of the screen and choose your font. Since we're going to be using a letter as a container for more text, try to choose a font with thick letters. I'll use Arial Black. Don't worry about the size for now. We'll resize the text as needed in a moment:
Selecting a font in Photoshop. Image © 2008 Photoshop Essentials.com.
Photoshop Text Effects: Choose a font from the Options Bar, preferably one with thick letters.

Step 4: Type A Letter Into The Document

Click anywhere inside your Photoshop document and type a letter to use as a container for the rest of your text. I'll type "T" since it's a nice, simple shape.

Step 5: Use Free Transform To Resize The Letter As Needed

If you need to resize your letter, press Ctrl+T (Win) / Command+T (Mac) to bring up Photoshop's Free Transform box and handles around the letter, then drag any of the handles (the little squares) to resize it. To avoid accidentally distorting to look of the letter as you resize it, hold down your Shift key as you drag the handles. If you want to resize the letter from its center, hold down the Alt(Win) / Option (Mac) key as well:
Resizing the letter with Free Transform in Photoshop. Image © 2008 Photoshop Essentials.com.
Photoshop Text Effects: Resize the letter as needed with Photoshop's Free Transform command.
Press Enter (Win) / Return (Mac) when you're done to accept the transformation and exit out of the Free Transform command.

Step 6: Create A Path From The Type

With the Type Tool still selected, right-click (Win) / Option-click (Mac) anywhere inside the document to bring up a sub menu of options for the text. We need to convert our letter into a path which we can use as a container for the rest of our text, so selectCreate Work Path from the sub menu:
The Create Work Path option in Photoshop. Image © 2008 Photoshop Essentials.com.
Photoshop Text Effects: Create a work path from the letter.
Depending on the color you're using for your text, you may or may not notice an outline around the letter once you've created the path. The outline is the path, and if you can't see it right now, you'll definitely see it in a moment.

Step 7: Hide The Type Layer

If you didn't notice the path around your letter after you selected "Create Work Path", you'll notice it after this step because we're going to hide the text layer from view since we no longer need to see it. On the far left of the text layer in the Layers palette is an eyeball icon. This is the Layer Visibility icon, but most people just refer to it as the "eyeball". When the eyeball is showing, the layer is visible in the document, and when it's not showing, the layer is hidden. Currently, the eyeball is showing, which is why we can see the letter in the document. Click on the eyeball icon with your mouse, which will not only hide the eyeball, it will hide the text in the document as well:
The Layer Visibility icon in the Layers palette in Photoshop. Image © 2008 Photoshop Essentials.com.
Photoshop Text Effects: Hide the letter from view in the document by clicking on its visibility icon in the Layers palette.
You can click back inside the empty box where the eyeball icon was displayed to make the layer visible again.
With the text hidden, only the path we created a moment ago is now visible:
Photoshop work path around the text. Image © 2008 Photoshop Essentials.com.
Photoshop Text Effects: The text is now hidden, revealing the path we created from the text.

Step 8: Click Inside The Path, But Don't Type Just Yet

Our path is now visible, and we're going to use it as a container for our text. We just need to add the text! With the Type Tool still selected, move your mouse cursor anywhere inside the path. You'll see the shape of your cursor change from an I-beam with a dotted square around it to an I-beam with a dotted elliptical shape around it, indicating that if you click the mouse and start typing, you'll be typing inside the path, which is exactly what we want. Go ahead and click anywhere inside the path, but don't start typing just yet.

Step 9: Change Your Font And/Or Font Size If Necessary

You're probably going to want to reduce the size of your font before you start typing, so before you actually type anything, go up to the Options Bar and set your font size to something more appropriate. I'll set mine to 36 pt. You may want to change the font as well. I'll change mine to Arial, rather than Arial Black which is what I used for the letter itself:
Changing the font and font size in Photoshop. Image © 2008 Photoshop Essentials.com.
Photoshop Text Effects: Change your font and font size in the Options Bar.

Step 10: Select "Justify All" From The Paragraph Palette

There's one more thing we're going to want to do before we start typing. We want to set the text justification to Justify All so that the text will fill up our shape from left to right. We can access the justification options from the Paragraph palette. If you don't already have the Paragraph palette open on your screen, with the Type Tool still selected, go up to the Options Bar and click on theCharacter and Paragraph palette toggle button:
The Character and Paragraph toggle icon in Photoshop. Image © 2008 Photoshop Essentials.com.
Photoshop Text Effects: Click on the Character and Paragraph palette toggle button in the Options Bar to access Photoshop's Character and Paragraph palettes.
By default, Photoshop groups the Character and Paragraph palettes together in the same palette group, both because they work as a team and to save screen space. If the Character palette is the one showing, simply click on the Paragraph palette's name tab at the top of the palette group to bring it to the forefront and send the Character palette to the background. With the Paragraph palette selected, click the Justify All option in the upper right of the palette. This will make sure that our text fills as much of the letter as possible:
The Justify All option in the Paragraph palette in Photoshop. Image © 2008 Photoshop Essentials.com.
Photoshop Text Effects: Click the "Justify All" option in the Paragraph palette.

Step 11: Type Your Text Inside The Path

All that's left to do now is add our text inside the letter. Go ahead and start typing, and as you do, you'll see your text filling the inside of the letter:
Typing inside the letter. Image © 2008 Photoshop Essentials.com.
Photoshop Text Effects: Begin typing inside the letter. As you type, the text conforms to the shape of the original letter.
Continue typing until your letter is filled with text.
The letter filled with text in Photoshop. Image © 2008 Photoshop Essentials.com.
Photoshop Text Effects: My letter "T" is now filled with text.

Step 12: Click On The Checkmark To Accept The Text

When you're done adding your text, click on the checkmark in the Options Bar to accept it:
Clicking the checkmark in the Options Bar in Photoshop. Image © 2008 Photoshop Essentials.com.
Photoshop Text Effects: Accept your text by clicking on the checkmark in the Options Bar.

Step 13: Hide The Path

With the text added, all that's left to do now is hide the path, and we can do that easily with the keyboard shortcut Ctrl+H (Win) /Command+H (Mac). And with that, we're done! Here's the final result, with the text in the shape of a letter T:
Photoshop text inside text effect. Image © 2008 Photoshop Essentials.com.
Photoshop Text Effects: The final result. The shape of the original letter is still visible thanks to the text inside of it.

light burst effect


 this Adobe Photoshop tutorial, we're going to see how to engulf text in an explosion of light and color.
There's quite a few steps involved in this text effect, and we'll be using a couple of filters that are not used very often in everyday Photoshop work, but creating the text effect is quite simple and the end result is definitely worth the effort.
Here's the text effect we're going for:
Adobe Photoshop Text Effects: The final effect
Let's get started.
Need A Printable Version Of This Tutorial? Get Unlimited Access To Our Print-Ready PDF eBooks!

Step 1: Open A New Photoshop Document

Open a new document in Photoshop by going up to the File menu and choosing New..., or by using the keyboard shortcut, Ctrl+N(Win) / Command+N (Mac). You can choose your own width and height for your document, but if you want to follow along, I chose the 640x480 size from the list of available presets to keep things simple. I've also left my Resolution value set to its default of 72 pixels/inch. Since I'm creating this text effect for the web, it makes no difference what I set the resolution value to, so the default value is fine:
Photoshop Text Effects: Creating a new document in Photoshop
Photoshop Tutorials: Create a new document in Photoshop. To follow along, use the "640x480" preset size.

Step 2: Add Your Text

With your new blank document open, grab the Type tool from the Tools palette or by pressing T on your keyboard. Make sure blackis selected as your foreground color. If it isn't, just press D on your keyboard to reset it to black. Choose your font in the Options Bar at the top of the screen. Thick, heavy fonts work best for this effect. Then, go ahead and enter your text. I'm going to use "Impact", and I'll type the words "LIGHT BURST":
Photoshop Text Effects: Enter your text
Photoshop Tutorials: Choose a thick, heavy font, and with black as your foreground color, enter your text.

Step 3: Resize Your Text With Free Transform

With your text layer selected in the Layers palette, use the keyboard shortcut Ctrl+T (Win) / Command+T (Mac) to bring up theFree Transform box and handles around your text. Hold down Shift+Alt (Win) / Shift+Option (Mac) and drag out any of the corner handles to make your text larger and fill up more of the document area. Holding Shift constrains the text proportions, and holding Alt/Option resizes the text from the center:
Adobe Photoshop Text Effects: Resize the text with Free Transform
Photoshop Tutorials: Resize the text with Photoshop's "Free Transform" command.

plastic font effect


In this Photoshop text effects tutorial, we're going to learn how to use Photoshop's Layer Styles to easily make text look as if it's made out of plastic. To create the effect, we're going to be using some "contours" that we'll be loading in, since they're not readily available to us by default, but don't worry, loading them is easy, and so is everything else we'll be doing.
Here's the effect we're going for:
Adobe Photoshop Text Effects: The final effect
Let's get started.
Need A Printable Version Of This Tutorial? Get Unlimited Access To Our Print-Ready PDF eBooks!

Step 1: Open A New Photoshop Document

The first thing we need to do is open a new document, so let's do that quickly using the keyboard shortcut, Ctrl+N (Win) /Command+N (Mac). This brings up Photoshop's New Document dialog box. Choose whichever size you like. I'm going to use the preset size of 640x480, as circled below:
Adobe Photoshop Text Effects: Creating a new document in Photoshop
Adobe Photoshop Text Effects: Create a new Photoshop document.

Step 2: Fill The Document With Black

Press the letter D on your keyboard to reset your Foreground and Background colors, so black becomes your Foreground color andwhite becomes your Background color. Then use the keyboard shortcut Alt+Backspace (Win) / Option+Delete (Mac) to fill your new document with the Foreground color, which in this case is black:
Adobe Photoshop Text Effects: The new document is now filled with black.
Adobe Photoshop Text Effects: Press "Alt+Backspace" (Win) / "Option+Delete" (Mac) to fill the new document with black.

Step 3: Add Your Text To The Document

Grab your Type tool from the Tools palette, or press T to quickly access it with the keyboard shortcut:
Adobe Photoshop Text Effects: Selecting the Type tool from the Tools palette.
Adobe Photoshop Text Effects: Select the Type tool from Photoshop's Tools palette.
Then, with the Type tool selected, go up to the Options Bar at the top of the screen and select your font. I'm going to use Helvetica Rounded Black for mine. You can choose whichever font you like from the ones you have installed on your system. A larger, thicker font tends to work best for this effect:
Adobe Photoshop Text Effects: Choosing the font in the Options Bar.
Adobe Photoshop Text Effects: Choose your font in the Options Bar.
Press the letter X on your keyboard to swap your Foreground and Background colors, so white becomes your Foreground color. We're going to choose a better color for our text using Layer Styles, but for now, white will do just fine. Then, with your font chosen and white as your Foreground color, click inside your document and add your text. I'm going to type the word "plastic":
Adobe Photoshop Text Effects: Typing the word 'plastic' into the document.
Adobe Photoshop Text Effects: Click inside your Photoshop document and add your text.
Resize your text as needed using Photoshop's Free Transform command by pressing Ctrl+T (Win) / Comand+T (Mac), which brings up the Free Transform box and handles around your text. Hold down Shift to constrain your text's proportions and drag any of the corner handles to resize the text. Hold down Alt (Win) / Option (Mac) as well as you drag to force the text to resize from its center point. Press Enter (Win) / Return (Mac) when you're happy with the size of your text to accept the change.

Twitter Delicious Facebook Digg Stumbleupon Favorites More